

On the main landing page for AnalyticsBar.com I have lots of links that basically serve as scrolling links for transitioning our visitors further down the page to specific sections (e.g. Features, Download, Contact, etc.) and even opening purchase forms and I had no way to track these with a basic Google Analytics setup...easily.
In comes Google Tag Manager:)
Now I'm not going to go into much detail about what Google Tag Manager is all about, but know this, it's a very useful interface for adding custom tracking events to a page without having to directly manipulate any code on your current pages! Yay! However, this does not mean you won't have to code anything because you do, but only in Google Tag Manager. With that said, I'm going to show you this very useful example of how to setup Google Tag Manager to start tracking any and all links you have on any page using custom JavaScript.
Before we begin let's first setup Google Tag Manager if you haven't already
Goto https://marketingplatform.google.com/about/tag-manager/
Sign in to Tag Manager or Start for free

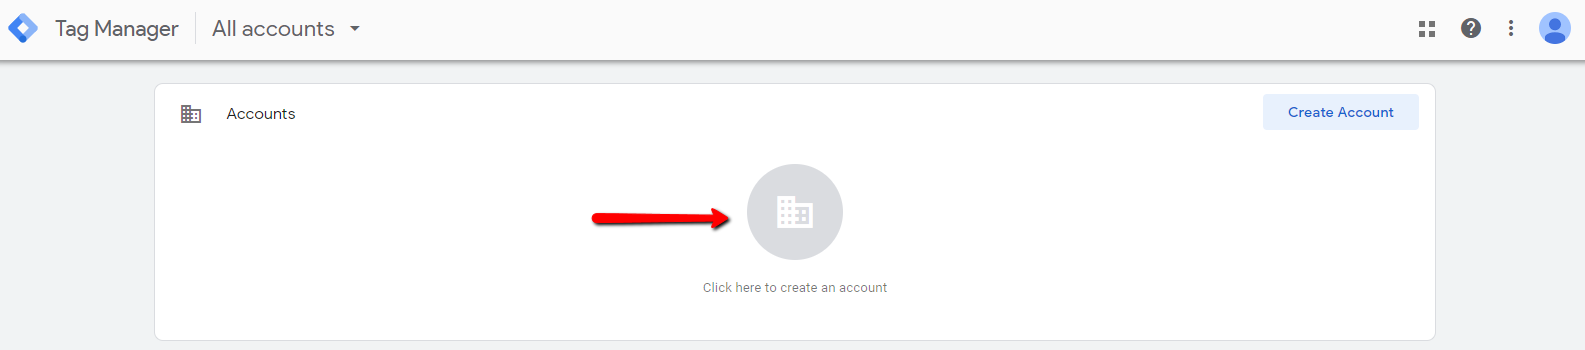
Create Account
Setup Account: Enter your Account Name
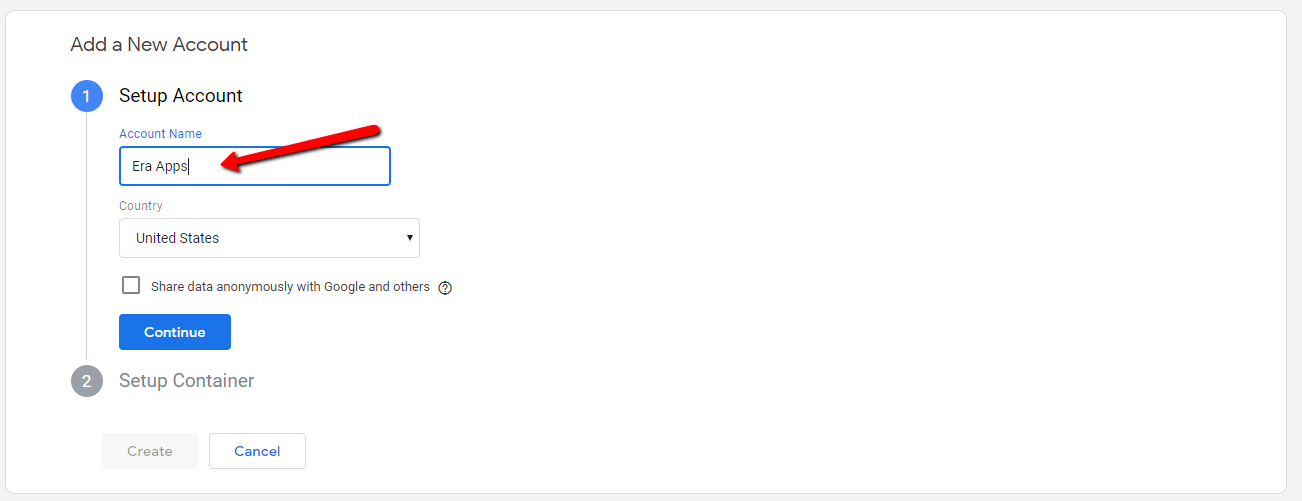
Setup Container: Enter the name of your website

That's It! You're done setting up Google Tag Manager that doesn't do anything...yet:)
Now for the real work. Let's start tracking clicks!!!
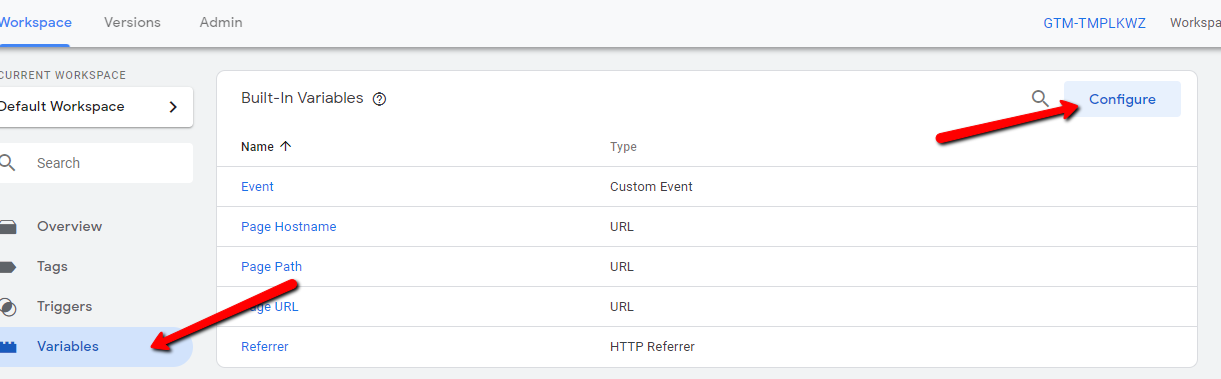
Step 1: Add our very first, really simple, Built-In Variable we'll need to start handling clicked elements
Click on Variables and Select Configure
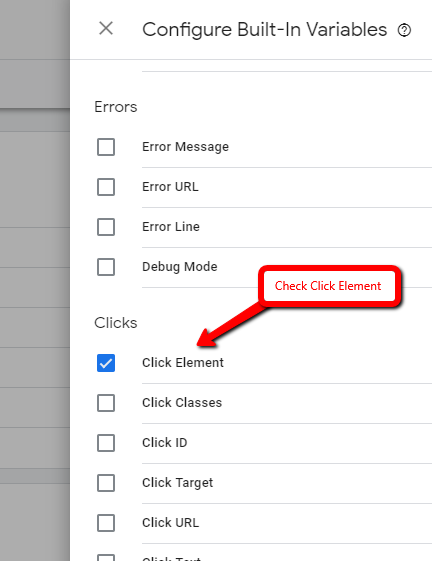
Check Click Element
Step 2: We need to create our very first variable to link our Google Analytics tracking ID with the actual click events we're going to start tracking
Click Variables and New (User-Defined Variables)
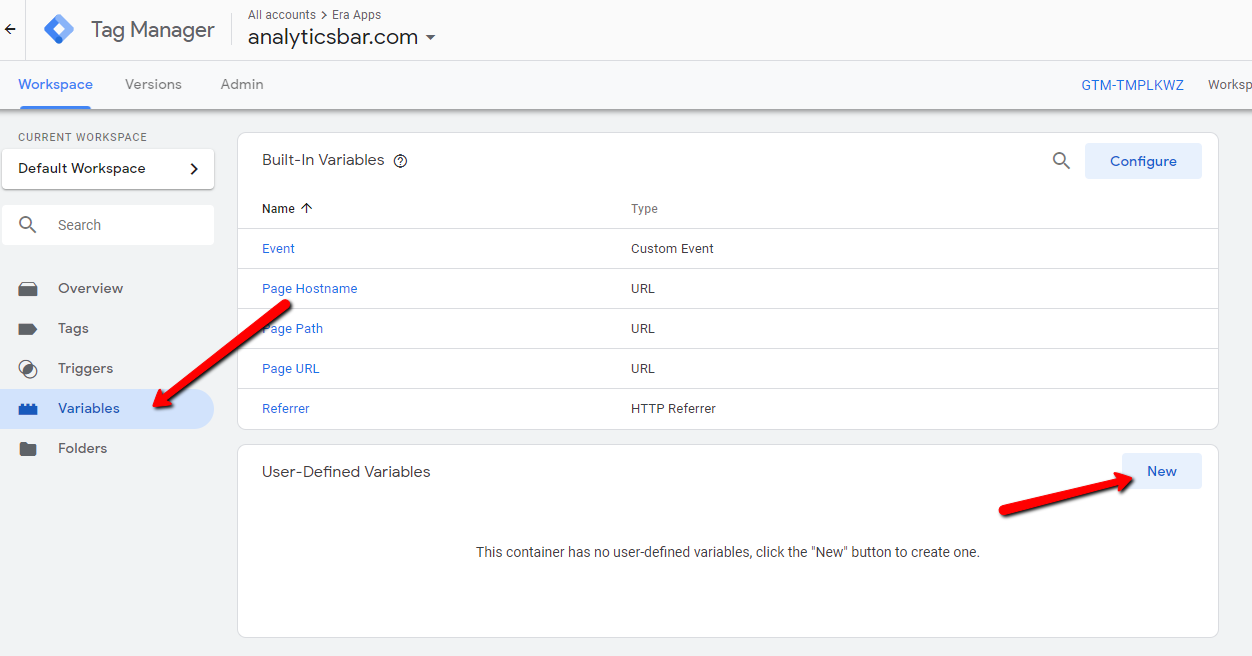
Enter the variable name "Google Analytics - UA ID" and click on Google Analytics Settings
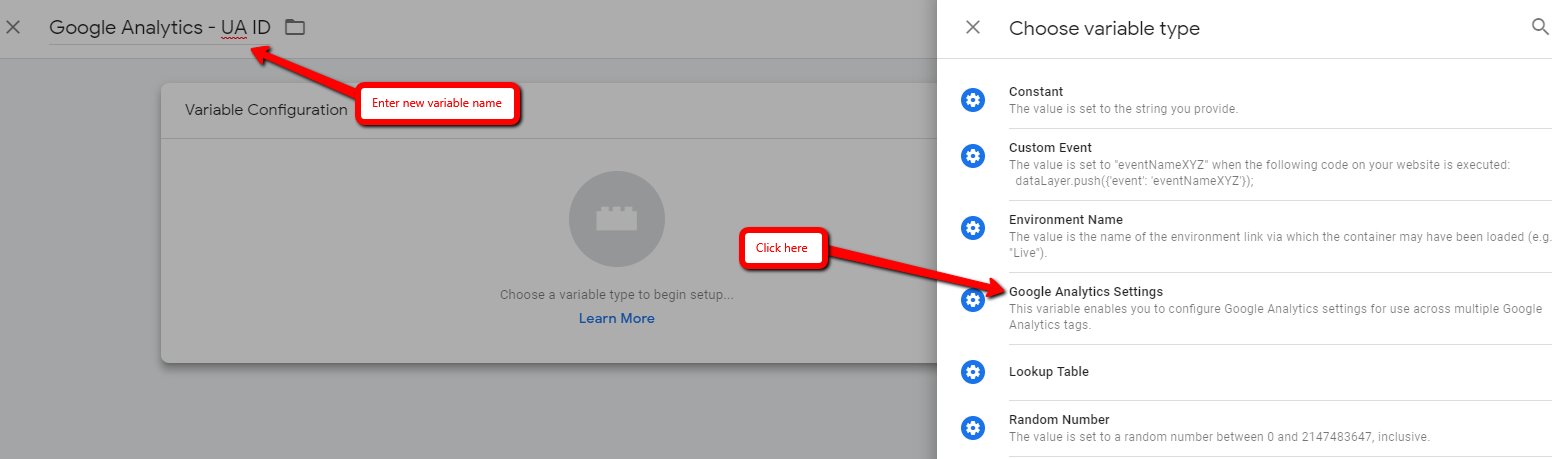
Enter the UA tracking ID found in your Google Analytics account page for your website (e.g. from https://analytics.google.com/analytics/web/)
Step 3: Now comes the code! Create a new Custom JavaScript variable function for finding the nearest anchor tag '<a>' from clicks on a page
Click Variables and New (User-Defined Variables)
Note: Variables are useful resources that evaluate to a specific value for whatever you need (e.g. the URL of a page, HTTP Referrer, etc., or in our case we're creating custom variable functions to evaluate custom values)

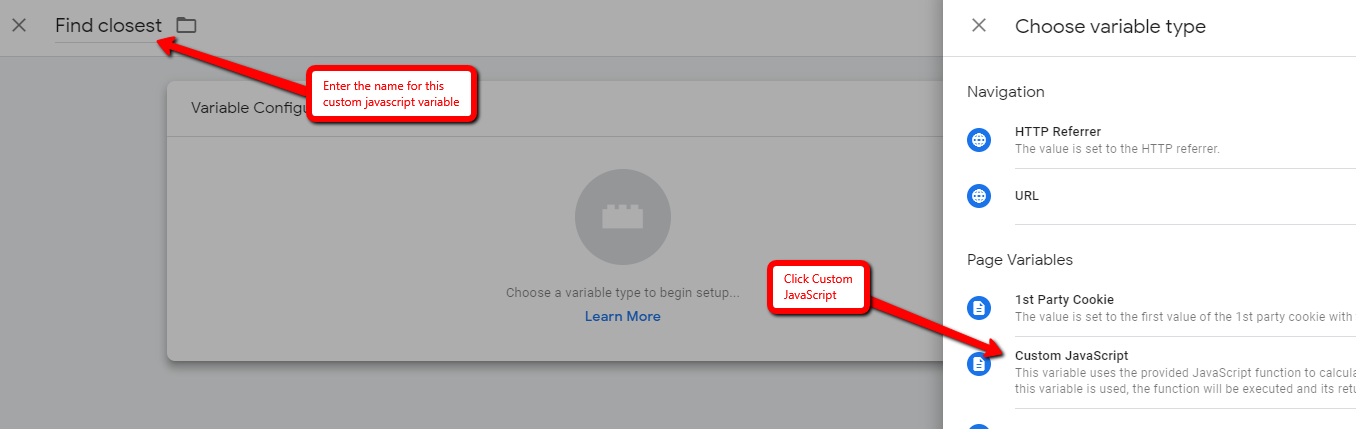
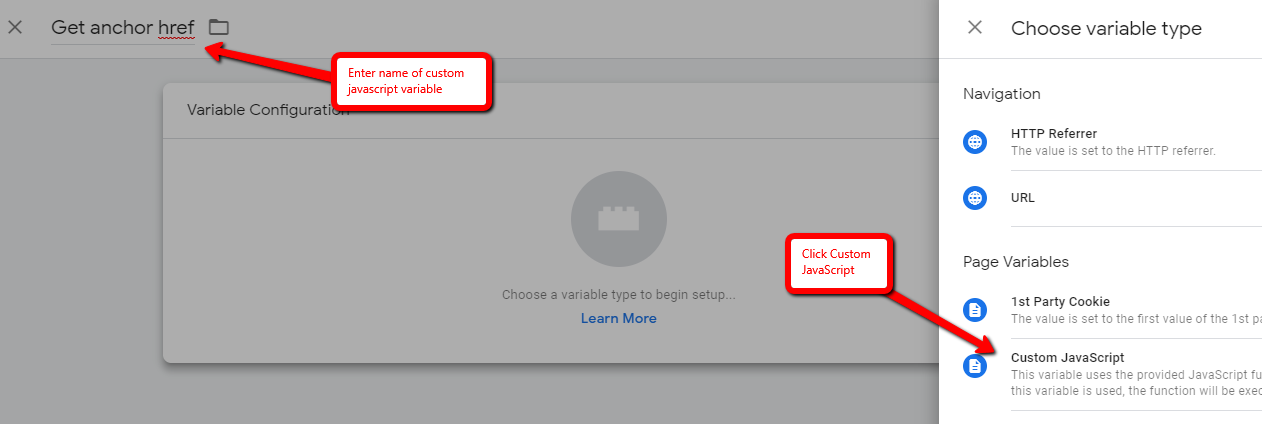
Enter the variable name "Find closest" and click Custom JavaScript
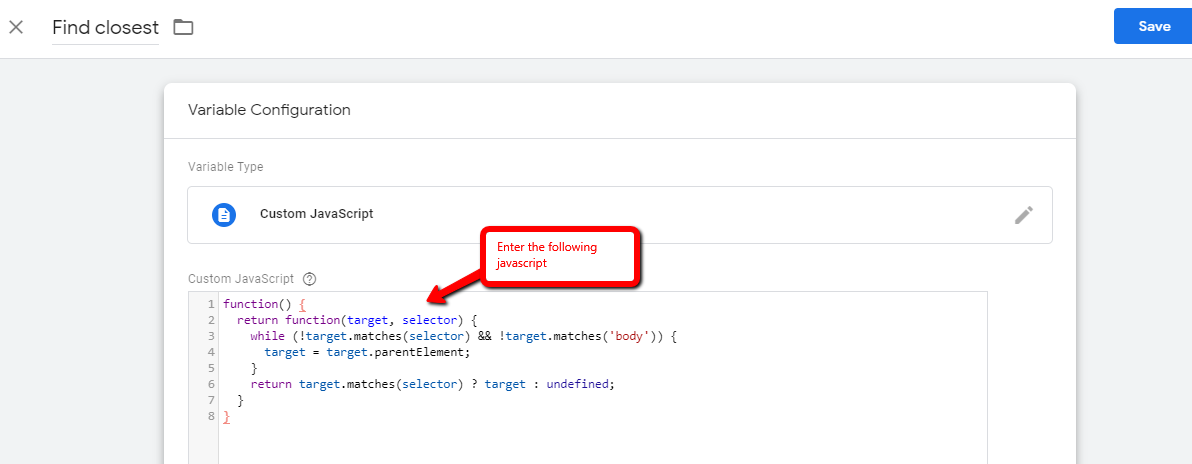
Enter your very first JavaScript
function() { return function(target, selector) { while (!target.matches(selector) && !target.matches('body')) { target = target.parentElement; } return target.matches(selector) ? target : undefined; } }
Note: What this function does is starting at the target (clicked element) search for the selector item (e.g. for <a> tags it would be 'a'). If the selector is not the target then move to the parent object of the target until you find it otherwise it's undefined
Step 4: Utilizing the "Find closest" code above, we need to create yet another function that will find our <a> tags and return the HREF value of the clicked anchor link.
Again...Click Variables and New (User-Defined Variables)

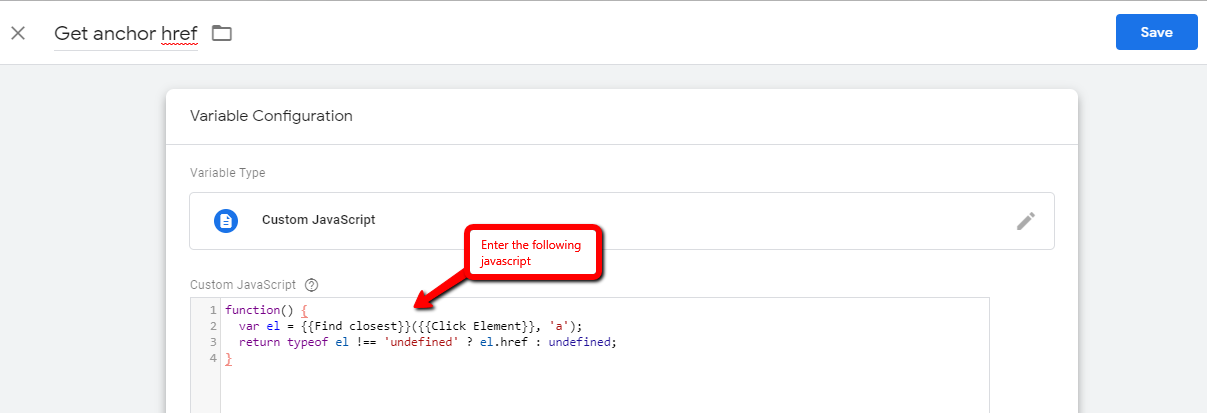
Enter the variable name "Get anchor href" and click Custom JavaScript
Enter the following JavaScript
function() { var el = {{Find closest}}({{Click Element}}, 'a'); return typeof el !== 'undefined' ? el.href : undefined; }
Note: What this code does is utilize the "Find closest" function and passes the parameter {{Click Element}} as target, and 'a' as the selector we're searching for in "Find closest". If the anchor link is found, we'll return the value of HREF.
Step 5: Very similar to the step above, we also want to get the innerText of the <a> tag
Yet again...Click Variables and New (User-Defined Variables)

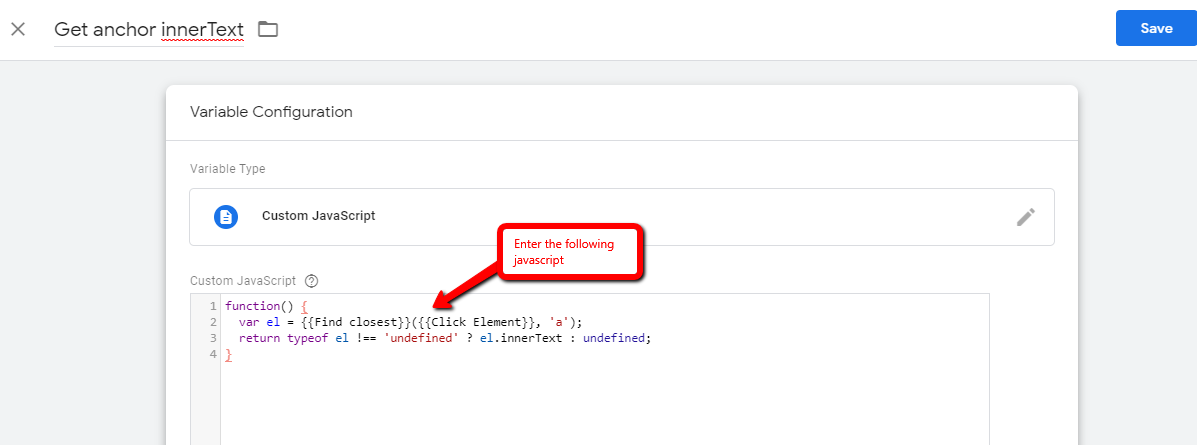
Enter the variable name "Get anchor innerText" and click Custom JavaScript

Enter the following JavaScript
function() { var el = {{Find closest}}({{Click Element}}, 'a'); return typeof el !== 'undefined' ? el.innerText : undefined; }
Note: What this code does is utilize the "Find closest" function and passes the parameter {{Click Element}} as target, and 'a' as the selector we're searching for in "Find closest". If the anchor link is found, we'll return the value of innerText.
Step 6: With all of our custom JavaScript variable functions in place now, we can finally setup our event triggers to start triggering based on the value returned from our custom functions.
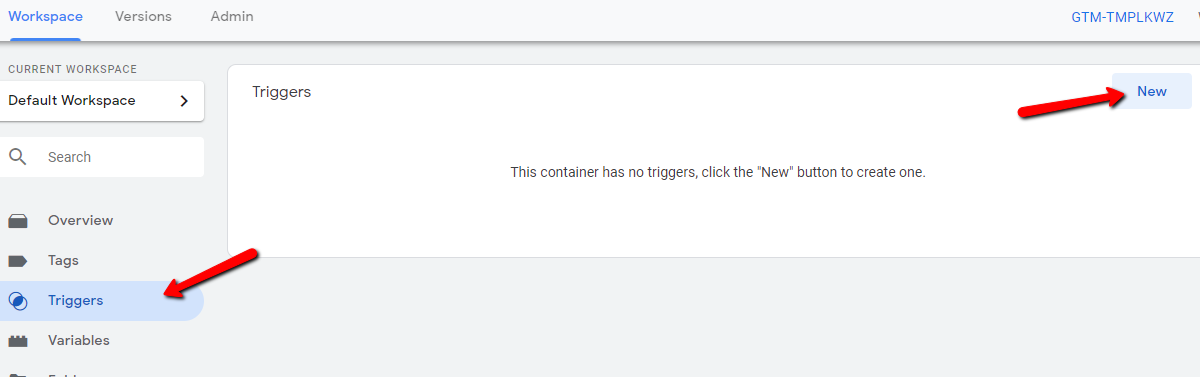
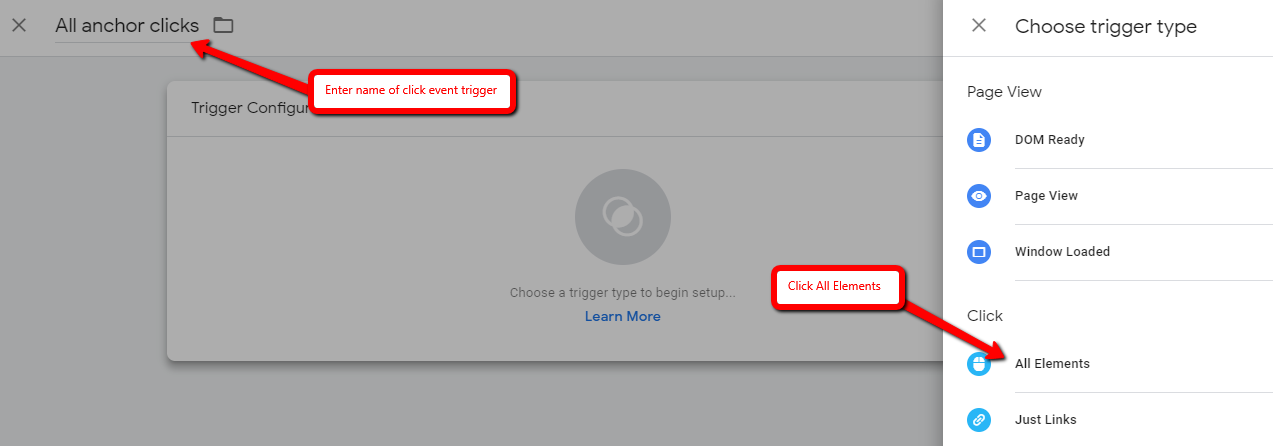
Click Triggers and New
Enter the trigger name "All anchor clicks" and click All Elements
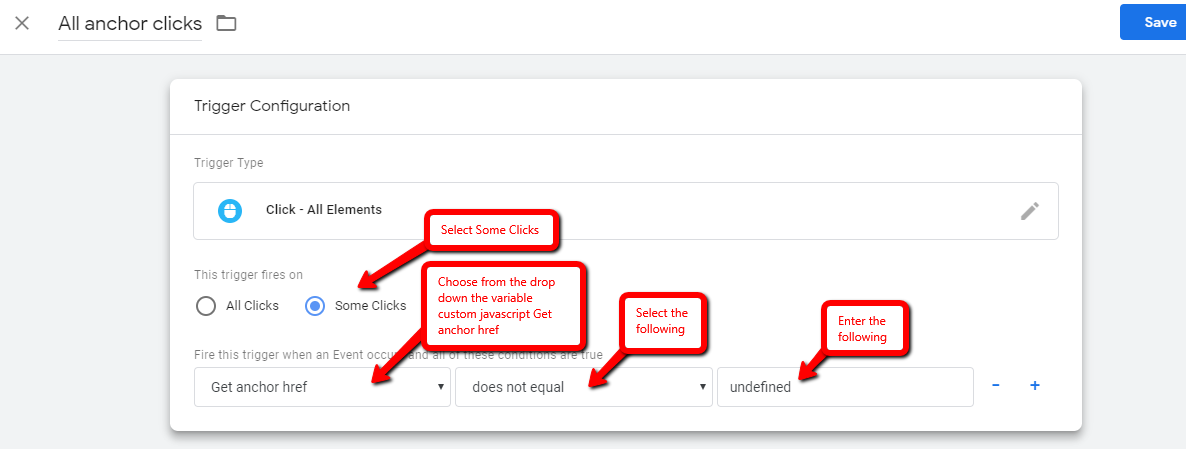
Set the trigger to fire on "Some Clicks". From the first drop down choose the Custom JavaScript variable "Get anchor href". Second drop down select "does not equal". Enter "undefined" in the last box.
Note: If it's not clear, what this does is sets this trigger to fire when "Get anchor href" evaluates to a real value, basically meaning it found an <a> tag from the clicked event.
Step: 7: Finally, we can create our official event tag for tracking the triggered event from above.
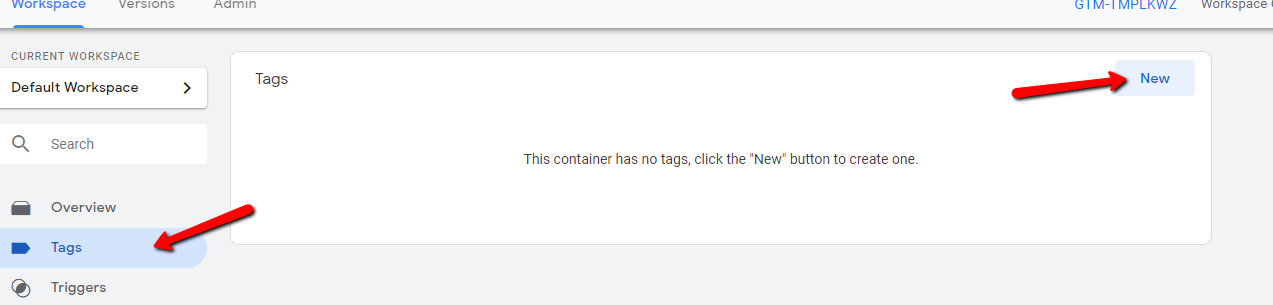
Click Tags and New
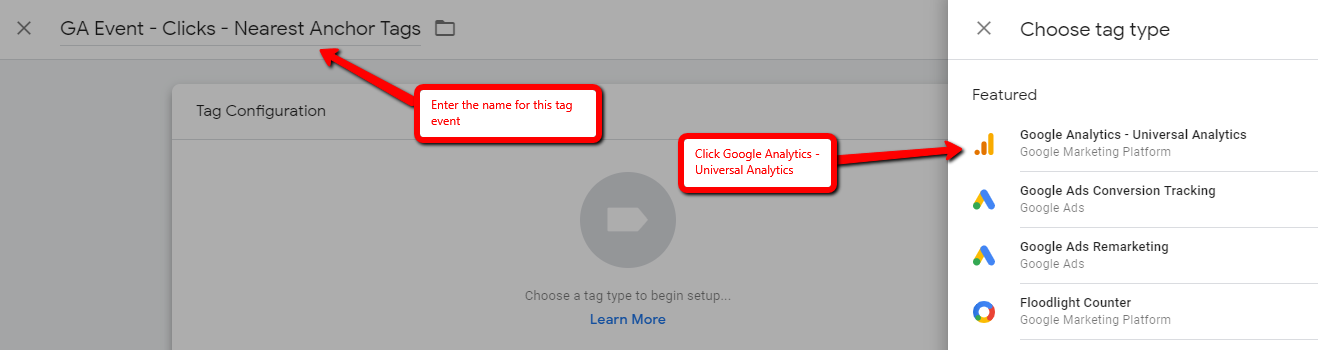
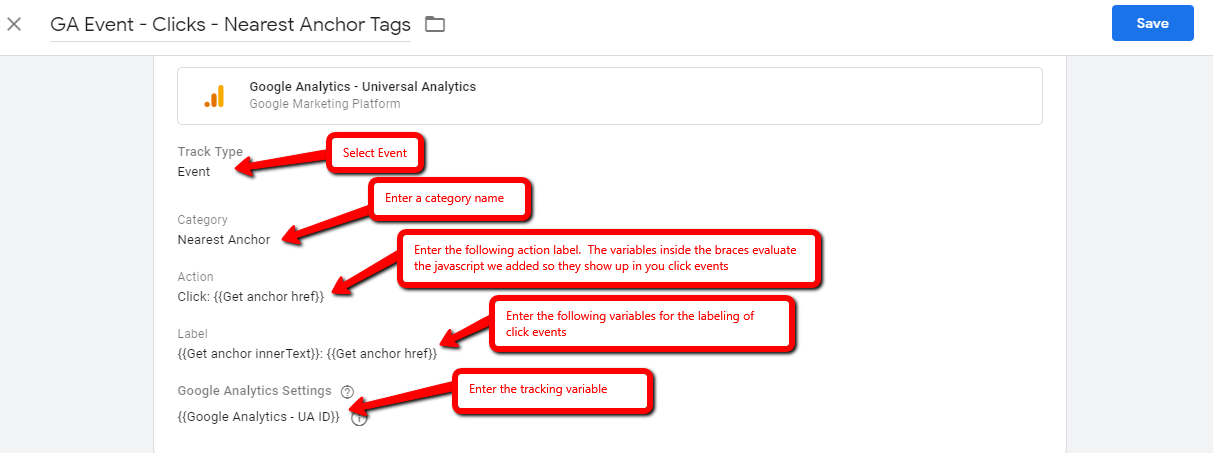
Enter the tag name "GA Event - Clicks - Nearest Anchor Tags" and click Google Analytics - Universal Analytics
Set the Track Type to Event. Enter a category name. Set the Action to "Click: {{Get anchor href}}". Set the Label to "{{Get anchor innerText}}: {{Get anchor href}}". Lastly, set Google Analytics Settings to the variable "{{Google Analytics - UA ID}}"
Note: This is where we actually set out event labels that will be stored and visible in Google Analytics for tracking these events. The amazing thing is these values will evaluate our custom JavaScript variables into the event values!
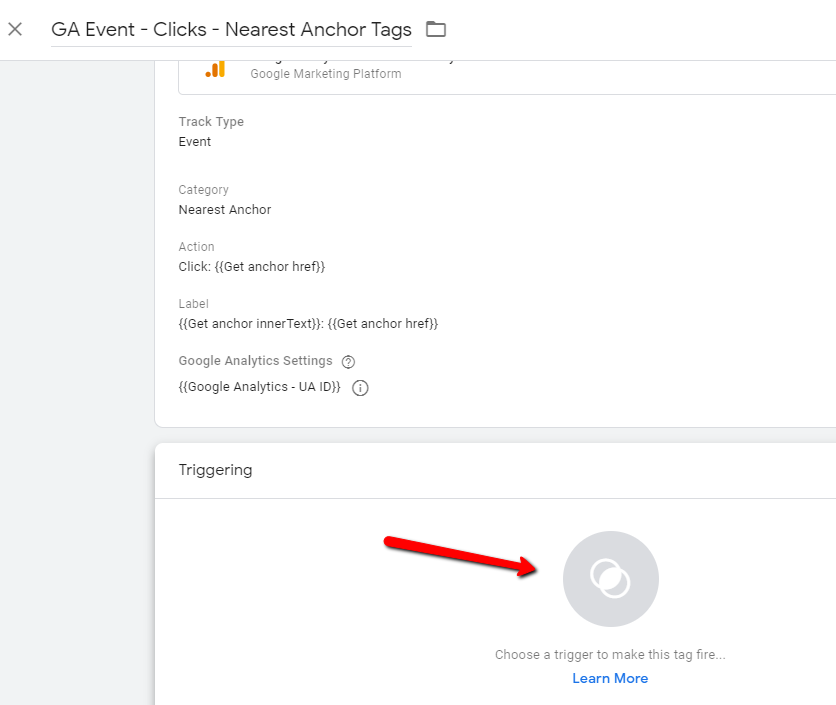
Select Triggering
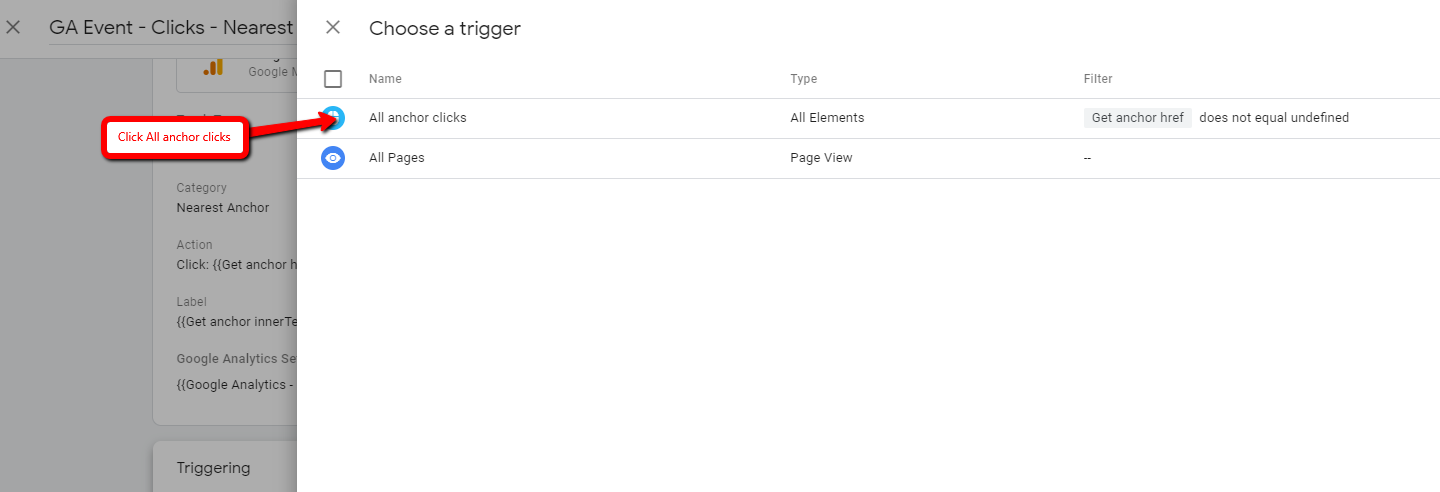
Click on our custom trigger "All anchor clicks"
Note: The tag configuration from above will be set and fire off the event once this trigger occurs on your web pages.
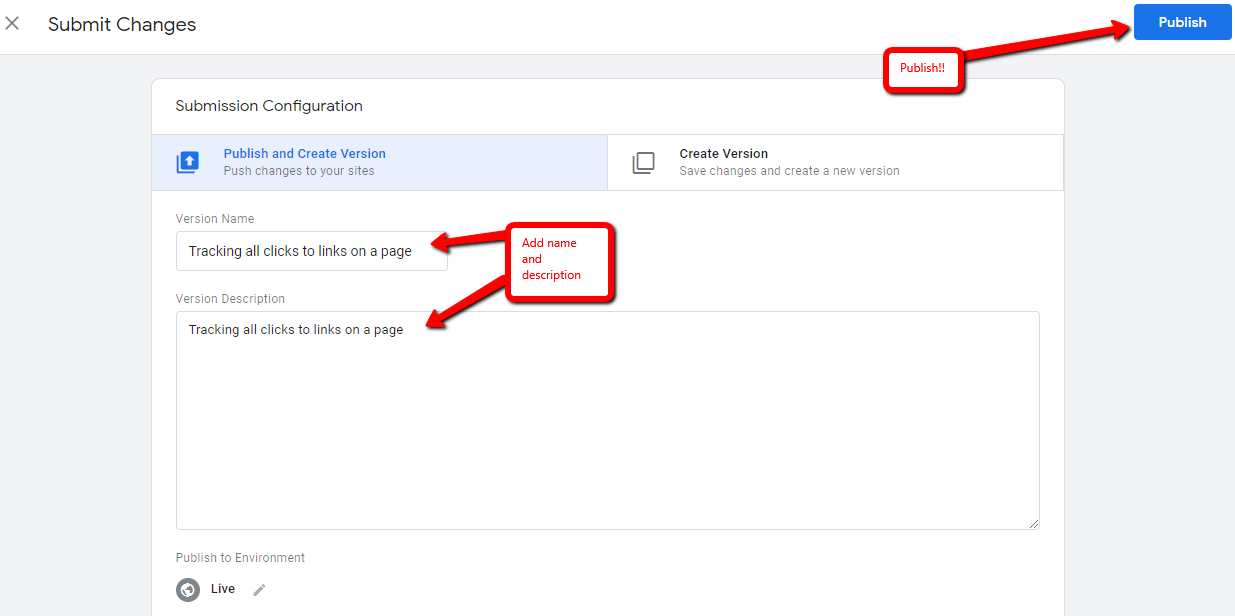
Step 8: Last step. Submit and Publish!
Let's Submit!

Add your version name and description, then Publish!
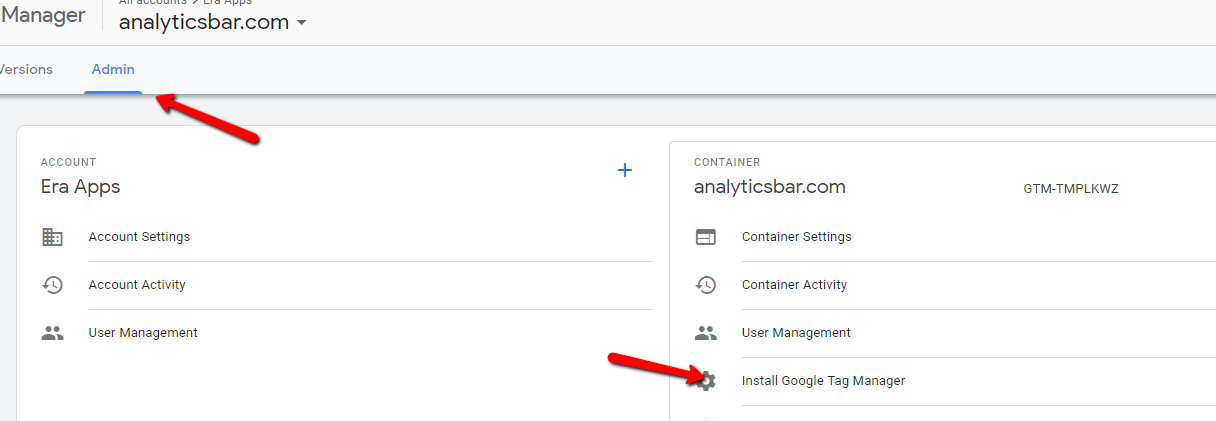
Click on the tag Admin and click Install Google Tag Manager
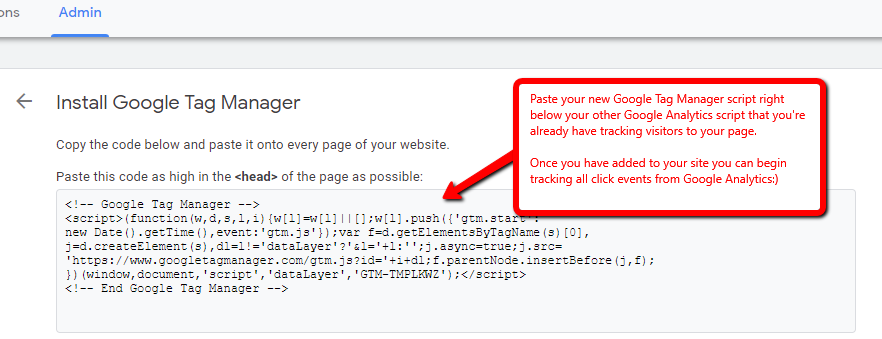
Add the following code right below your other Google Analytics script that you're already using for tracking page views
That's It! You're All Done.
Now start tracking your custom click events of your super awesome website within Google Analytics https://analytics.google.com/analytics/web/.